
Overline text
Installation Video
Add a description here
Before you start
Step 1.
Make sure you have the right tools:
1. A drill or an impact wrench
2. A square bit
3. A pencil
4. A level
5. A stud finder
6. Tape measure
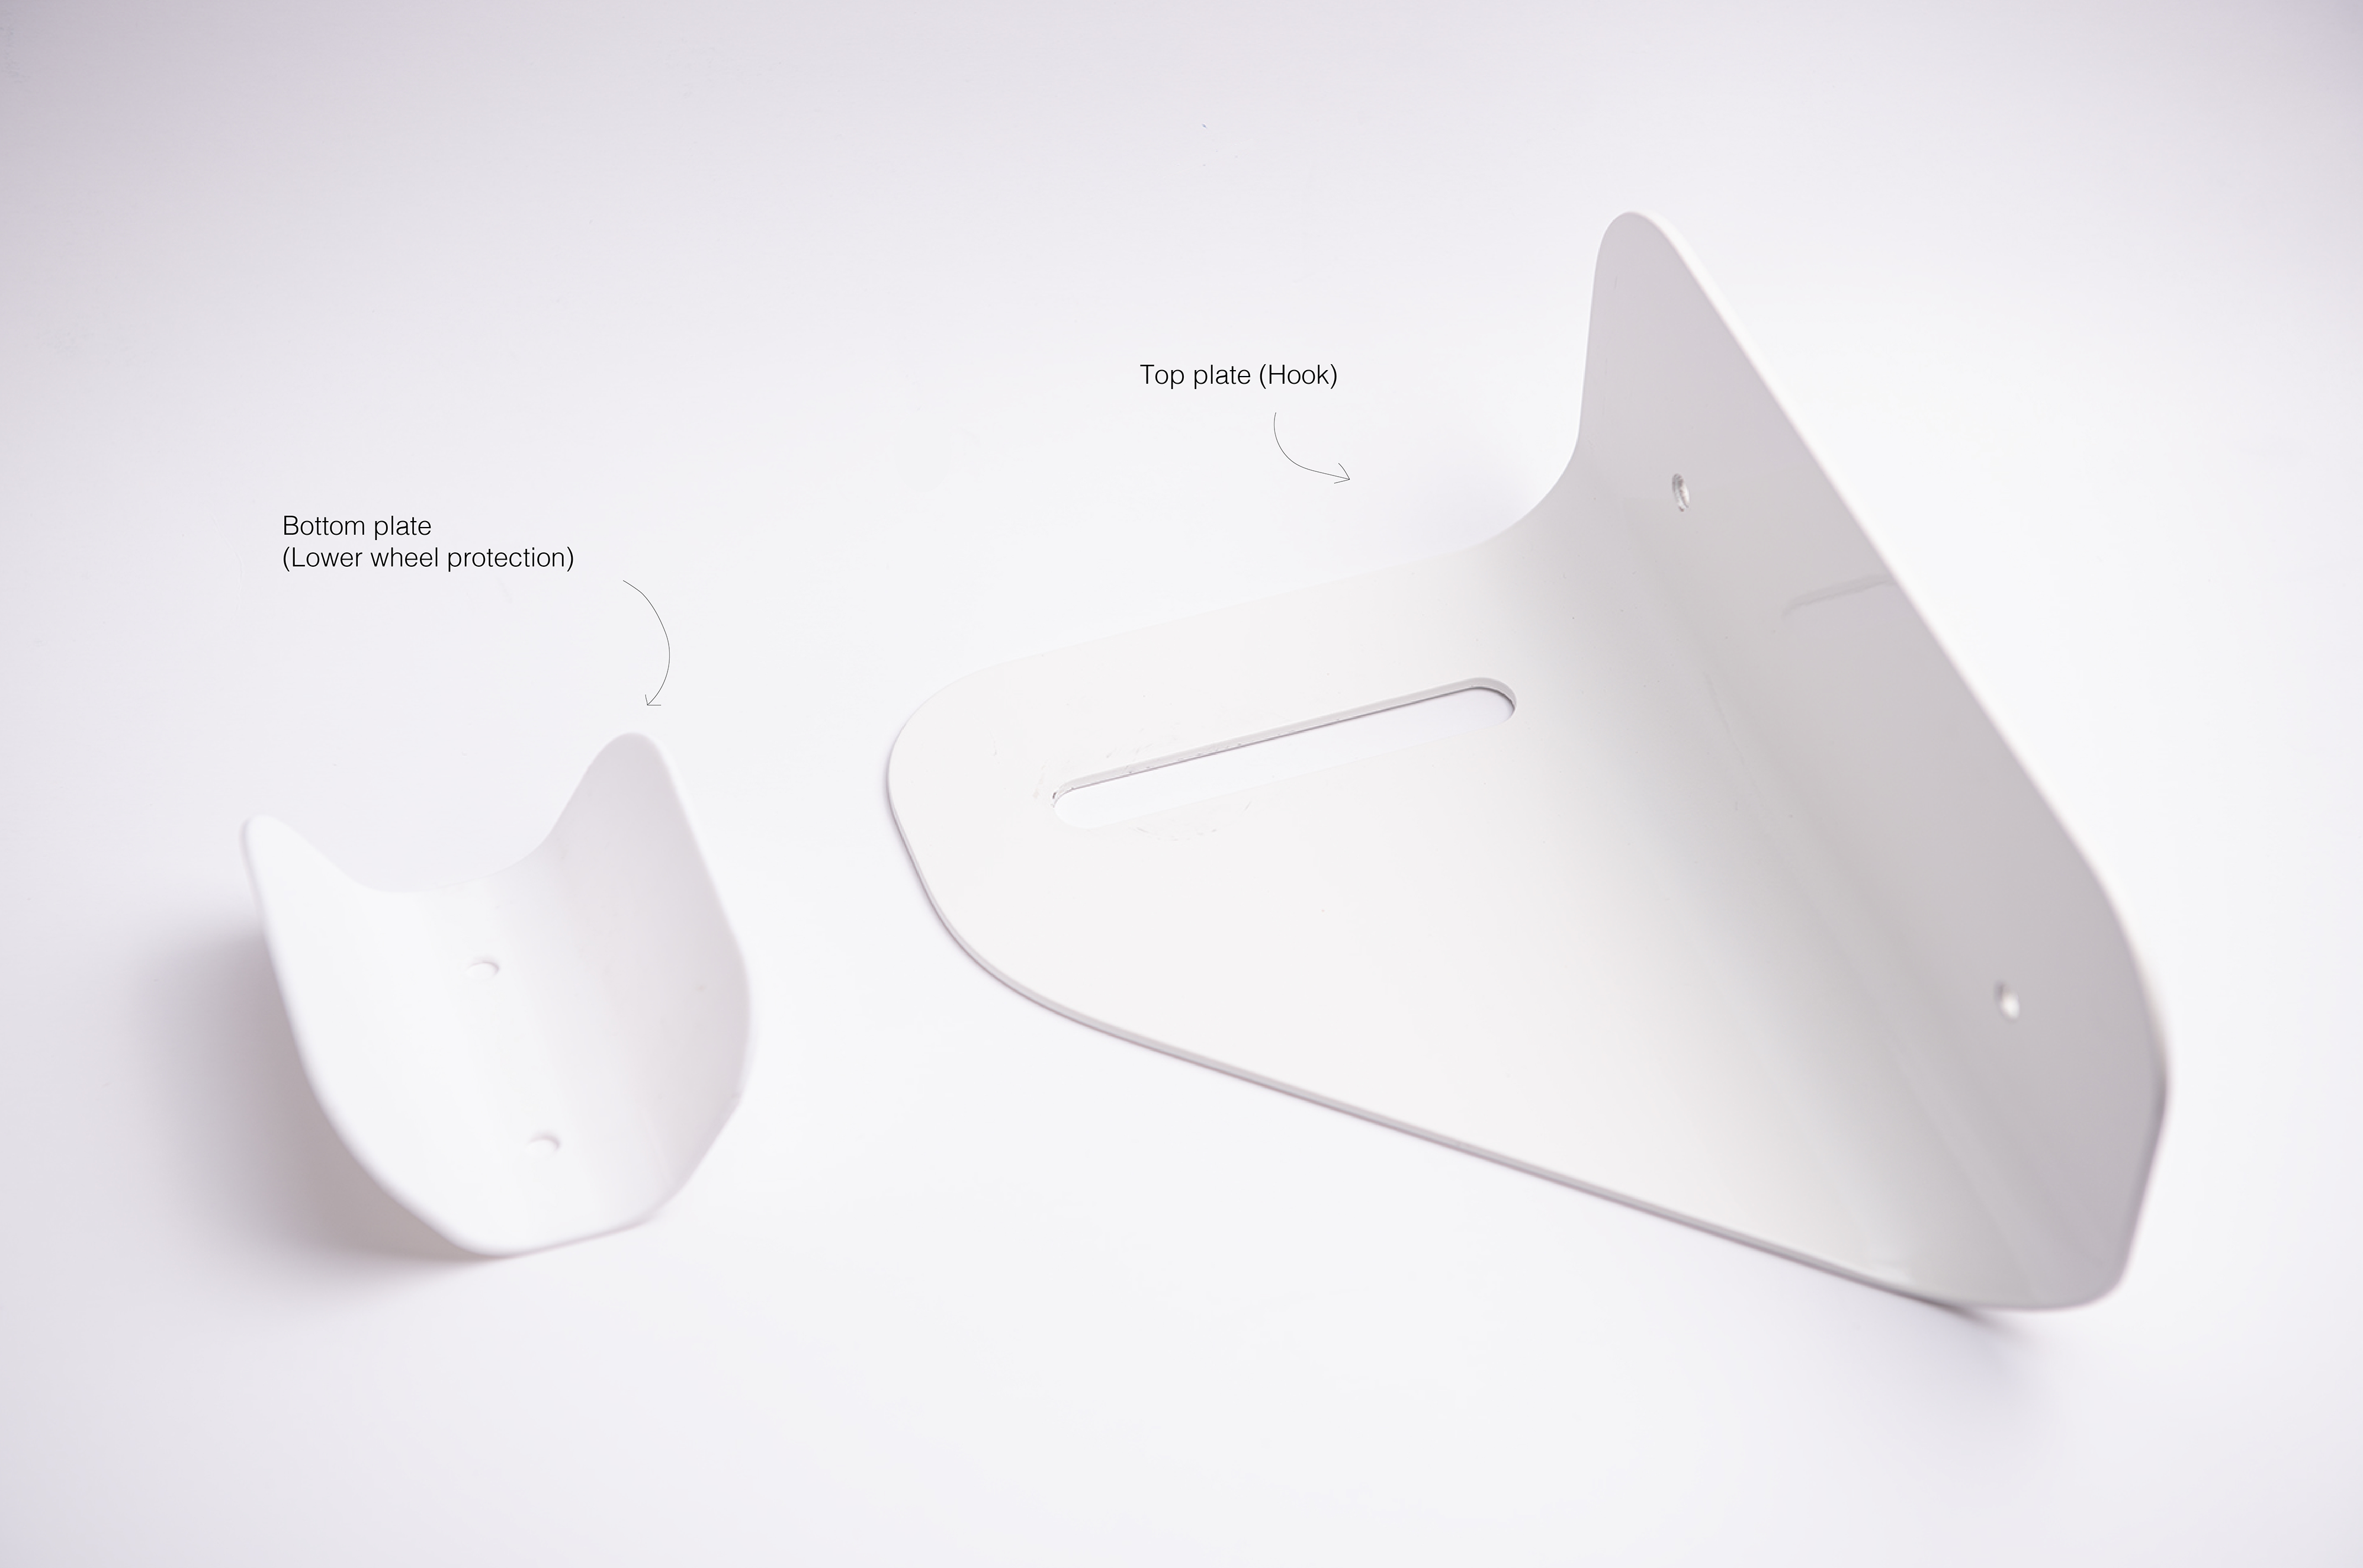
What is included with your hook:
Top plate (x1)
Bottom plate (x1)
Peg (x1)
Screws (x4)
Find something solid
Step 2.
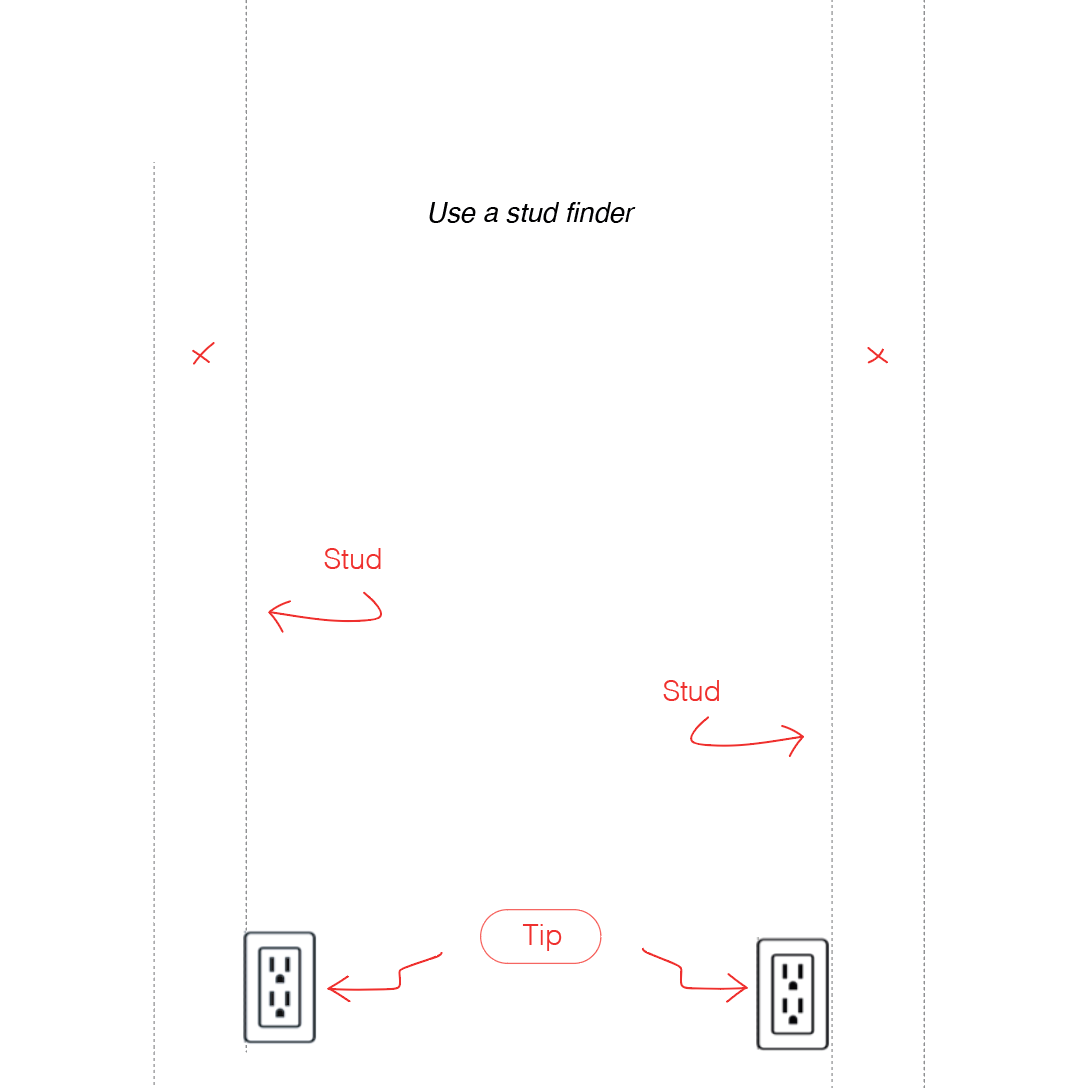
1. It is imperative to screw the hook into a stud and not simply into the drywall.
2. Use a locator to locate the stud in the wall where you want to install The Hook by Bonnes Intentions .
3. Mark the middle of the stud directly on the wall with a pencil.
TIP
Electrical outlets are usually installed directly on the sides of the uprights. Locate a receptacle and most of the time you will find a stud.
Position your hook
STEP 3.
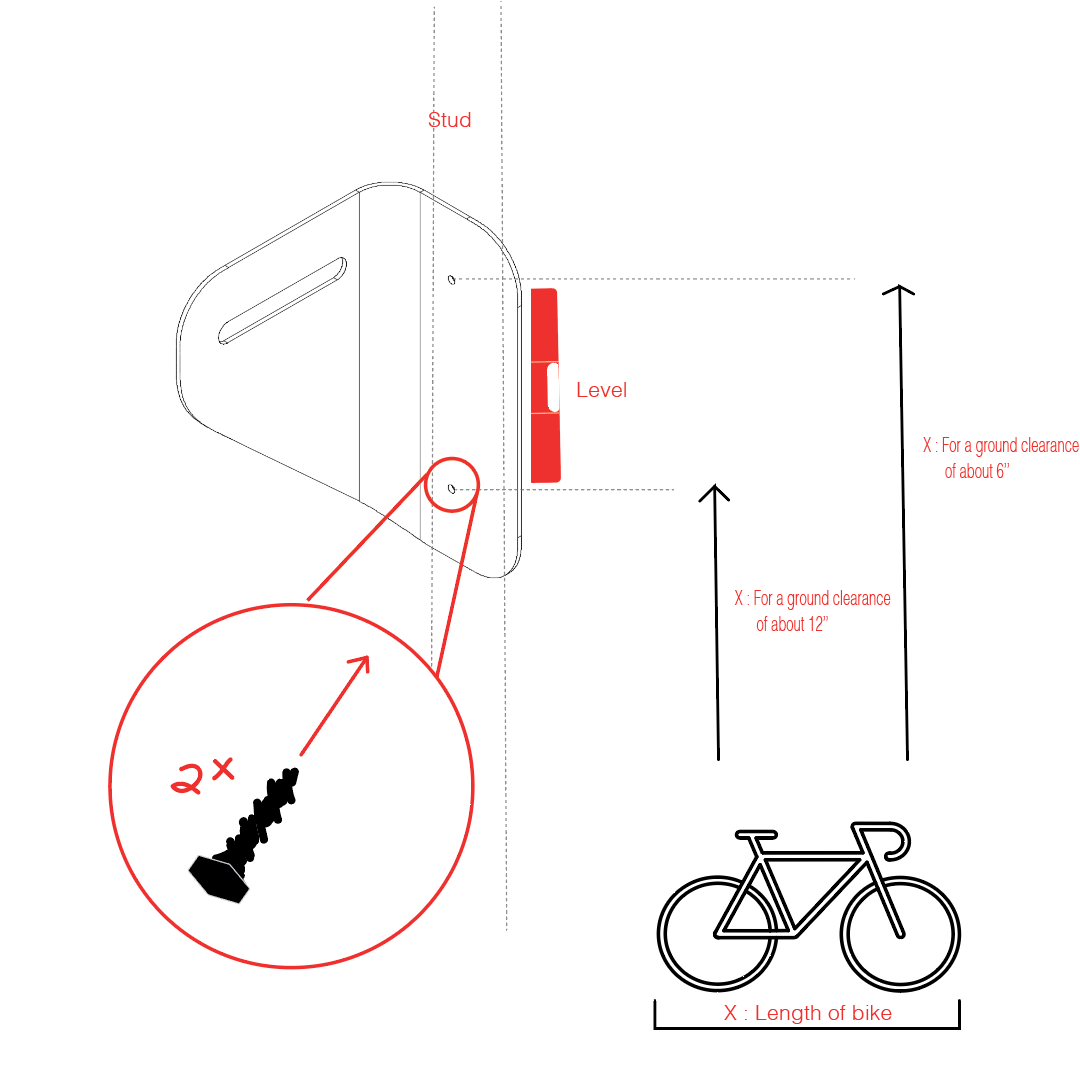
1. Measure the total length of your bike with the tape measure (front wheel to rear wheel);
2. Reflect this measurement on your wall, by measuring the height from the floor to the height equivalent to the length of your bike, using the tape measure;
3. Mark this location with a pencil. The mark must be centered at the previously found measurement;
4. Choose the height of the top plate by aligning:
a. The bottom screw hole with the mark for approximately 12" clearance between the wheel and the floor.
Or
b. The top screw hole with the mark for approximately 6" clearance between the wheel and the floor.
5. Insert the first screw using the drill. Level the hook and screw the second one. Before proceeding to the next step, make sure that the plate is still level and that all the screws are firmly anchored.
Install your Bonnes Intentions Hook
STEP 4.
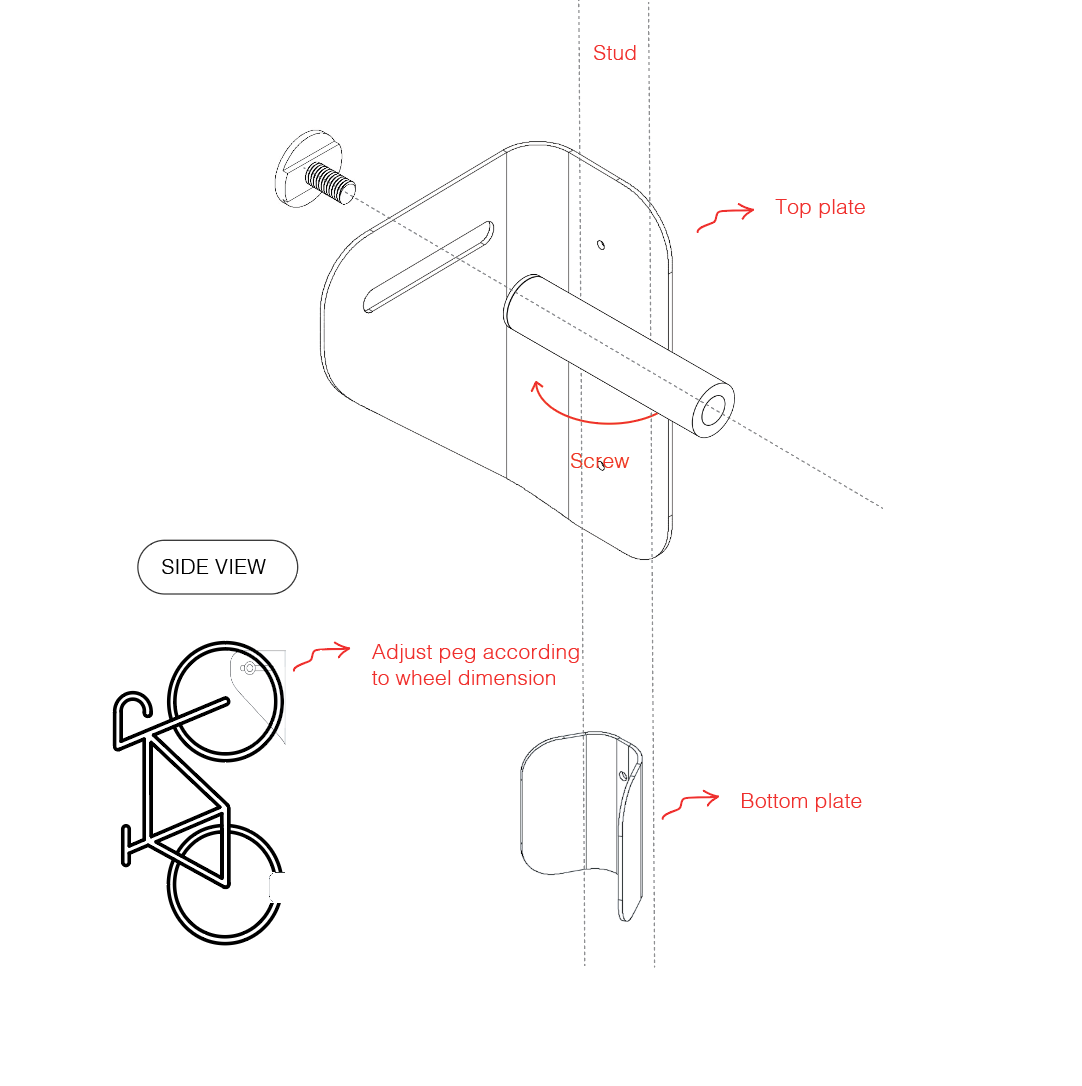
1. Insert the rectangular part of the peg into the slider of the top plate. Screw the peg into the tube until it is firmly anchored;
2. Install your bike and adjust the distance between the wall and the peg according to your wheel size. The wheel should sit completely on the metal, not on the wall;
3. Make sure your bike is upright and slide the bottom plate under the portion of the rear wheel that touches the wall. Using a pencil, note the top and bottom of the plate;
4. Remove your bike and screw in the bottom plate using the drill, screws and level.