
Vidéo d'installation

Avant de commencer
Étape 1.
Assurez-vous d’avoir les bons outils:
1. Un ensemble de douille (ratchet) ou une perceuse avec la tête hexagonal ¼
2. Mèche à bois 3/16 (recommandée)
3. Un crayon
4. Un niveau
5. Un détecteur de montant
Ce qui est inclus avec votre base :
Sous plaque (x1)
Plaque principale (x1)
Rondelles (x4)
Tires-fonds (x4)
Trouvez du solide
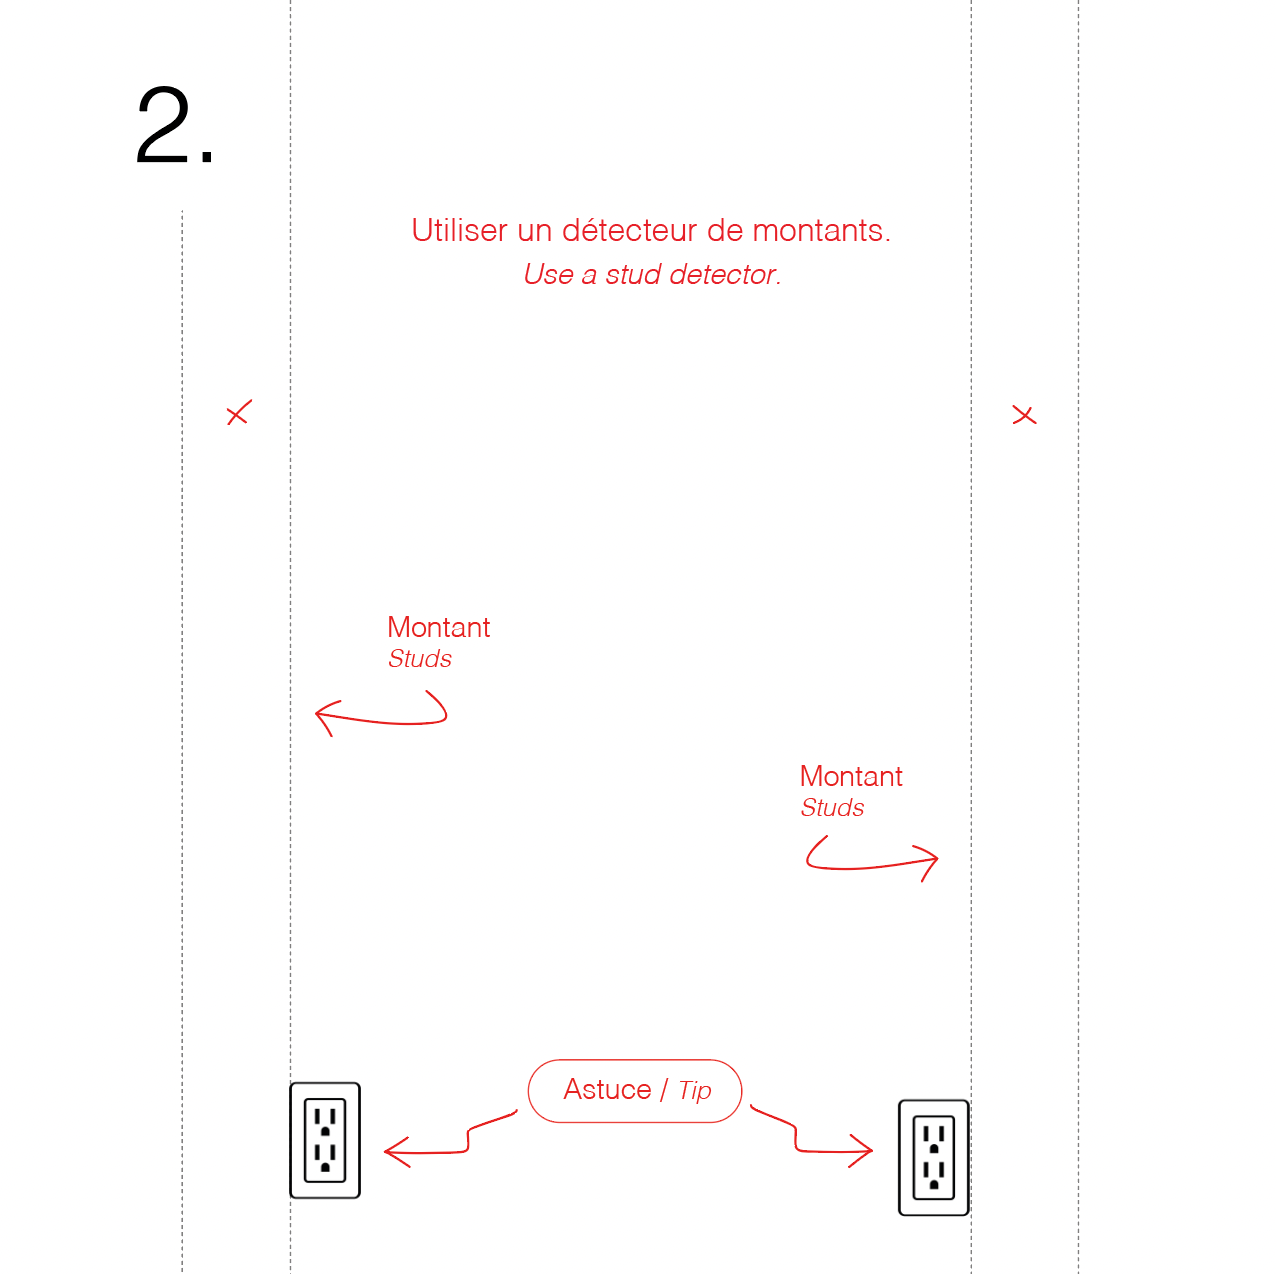
étape 2.
1. Il est impératif de visser le support dans des montants et non simplement dans le gypse.
2. Utiliser un détecteur pour repérer les montants dans le mur où vous souhaitez installer le support Bonnes intentions.
3. Marquer le milieu des montants directement sur le mur avec un crayon à mine.
ASTUCE
Les prises électriques sont habituellement installées
directement sur les côtés des montants. Repérez une prise et la plupart du temps vous trouverez un montant.
Installez votre base
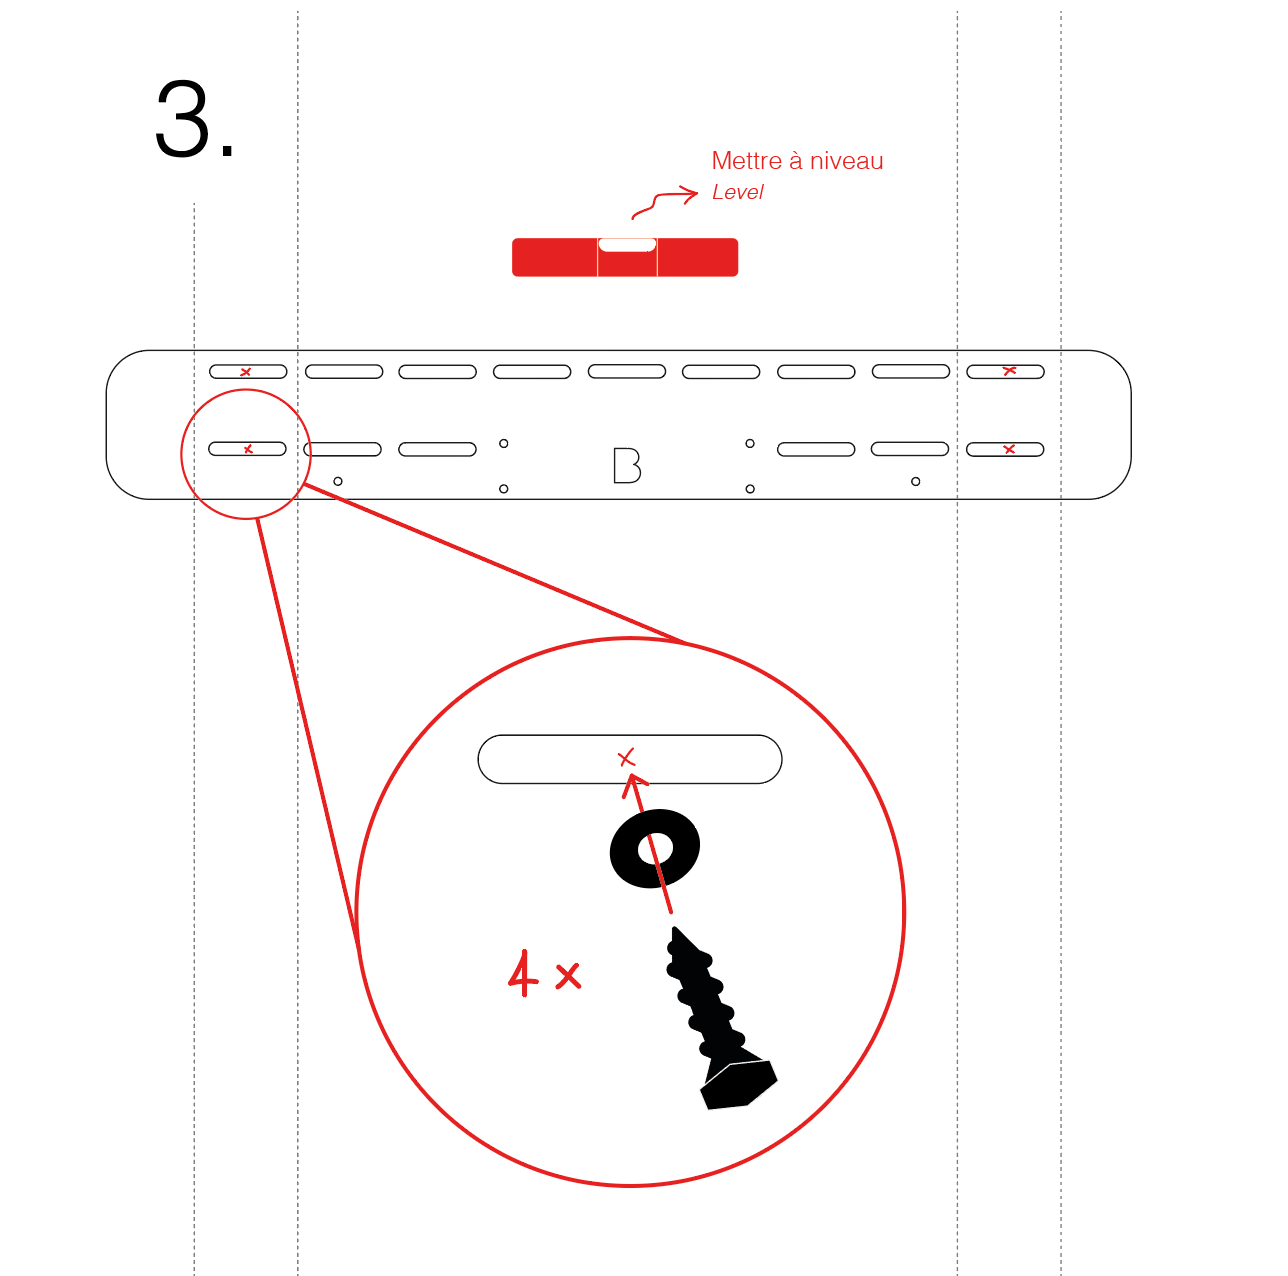
ÉTAPE 3.
1. Prendre la sous-plaque et aligner celle-ci avec les montants préalablement trouvés ;
2. Positionner la sous-plaque parfaitement à l’horizontale avec l’aide d’un niveau ;
3. Marquer au crayon l’emplacement des 4 vis de soutien. Celles-ci doivent être directement au centre des montants.
Nous vous recommandons de prépercer les 4 emplacements de vis à l’aide d’une perceuse et d’une mèche 3/16. Ceci facilitera beaucoup l’installation des tire-fonds.
4. Insérer une rondelle sur chaque tire-fond et visser solidement à l’aide de la tête hexagonale sur une perceuse ou bien d’une clé à cliquet et la douille appropriée.
5. Avant de passer à la prochaine étape, assurez-vous que la sous-plaque est encore à niveau et que toutes les vis sont
solidement ancrées.
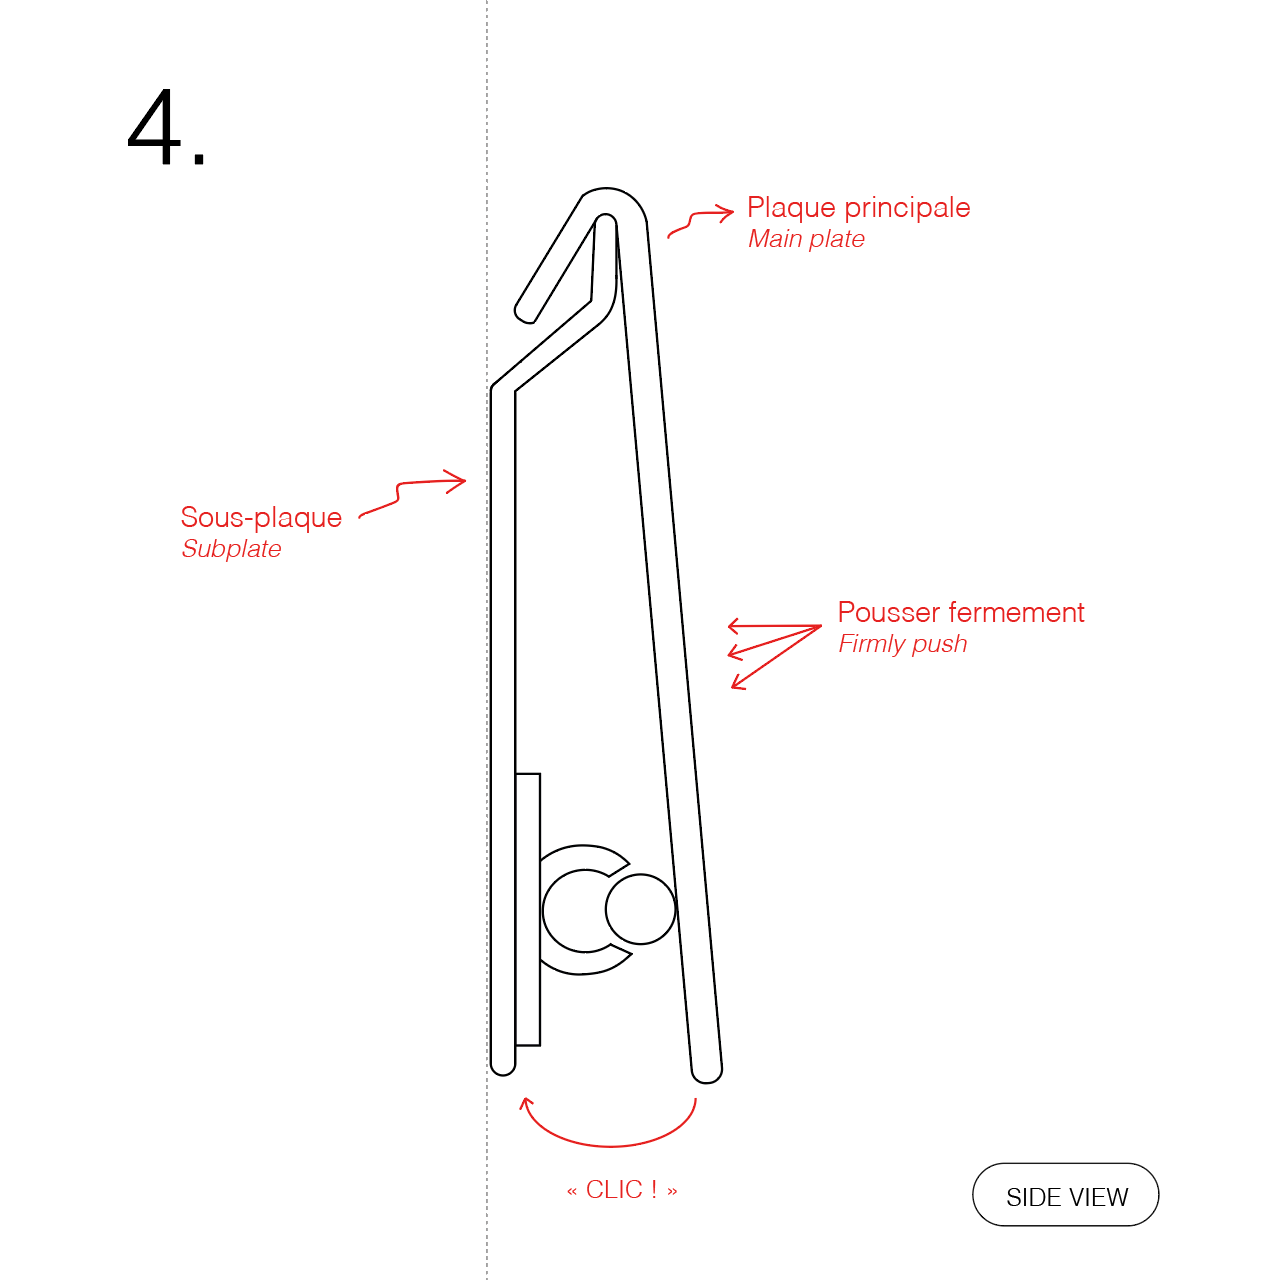
Installez votre support Bonnes intentions
ÉTAPE 4.
1. Prendre la plaque principale et déposer la partie recourbée sur le dessus de la sous plaque ;
2. Glisser tranquillement la plaque sur l’horizontal pour trouver le centre de la sous plaque ;
3. Une fois au centre, poussez fermement la plaque
avec deux mains vers le mur ;
4. Lorsque vous entendez un “clic” franc : votre support est prêt à être utilisé à votre guise !